
Ever since I first used blogger I wondered how to put my own tabs or navigation bar below the header part of the page. I have tried lots of ways editing the html template and still haven’t got what I really wanted. However on the new blogger template I have found a way to put tabs on my page. This article will show you how to put tabs on your page the easy way. The steps are as follows:
STEP 1: ACCESS THE EDIT LAYOUT SECTION. When you on the blogger dashboard you can access it by clicking the Design link.
STEP 1: ACCESS THE EDIT LAYOUT SECTION. When you on the blogger dashboard you can access it by clicking the Design link.
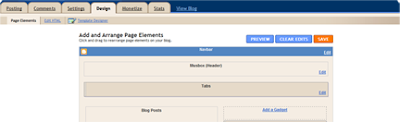
STEP 2: ADD PAGE ELEMENT. When you’re already in the layout section (see image above) the next thing to do is to add a page element or gadget of type “HTML/JavaScript” and place it just below your page header. Next is to add the following codes in the widget.
<ul>
<li><a href="place url or link in here">Tab 1</a></li>
<li><a href="place url or link in here">Tab 2</a></li>
</ul>
<li><a href="place url or link in here">Tab 1</a></li>
<li><a href="place url or link in here">Tab 2</a></li>
</ul>
For those who do not know about html codes, the <ul></ul> are called "unordered HTML list". By definition the "ul" tag defines an unordered list (bulleted list). The next tags are the <li></li> which defines a list item. Then inside the "li" tag is an "<a>" tag which defines an anchor. Meaning you can link another document or page using the href attribute by putting the link as the value of the href. You could learn a lot about html codes in w3schools.
Note: The tabs or the navigation bar will adapt the design of your template. Also, you can customize the code as you like. You can add as many tabs as you like by simply adding another <li></li> tags, just be sure to insert it in the middle of the <ul></ul> tags. Also remember to put an anchor <a href=”” </a> in the list tag to make a reference of your tab. You could also change the name of the tab (e.g. Tab1). When you’re done customizing your tabs, make sure to save it. That should do it. Thank you for reading.
No comments:
Post a Comment